
maxi cosi pria instruction manual
Maxi-Cosi Pria Instruction Manual: A Comprehensive Guide
Welcome! This manual provides detailed guidance for the safe and correct installation and use of your Maxi-Cosi Pria car seat.
Prioritize child safety by carefully following each step.
The Maxi-Cosi Pria is engineered with a focus on safety, comfort, and ease of use for both parents and children. This car seat is designed to protect your little one during every journey, from their first ride home as a newborn to later stages of growth.

This model boasts a comprehensive safety system, including Side Impact Protection (SIP) technology, a steel-reinforced frame, and energy-absorbing foam. These features work together to significantly reduce the risk of injury in the event of a collision.
The Pria is also designed with convenience in mind. It features easy-to-adjust harnesses, multiple recline positions, and removable, machine-washable fabrics. This ensures a comfortable and customized fit for your child, while simplifying cleaning and maintenance for you.
Important: Before using the Maxi-Cosi Pria, please read this instruction manual thoroughly. Understanding all features and proper installation procedures is crucial for ensuring your child’s safety. This guide will walk you through each step, from unboxing to installation and ongoing maintenance.
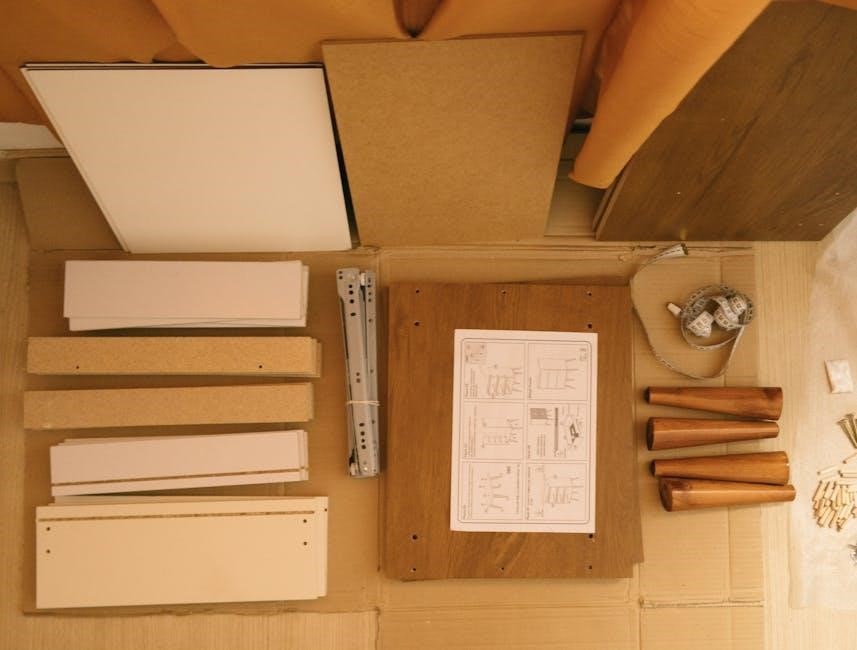
Unboxing and Component Checklist
Carefully remove the Maxi-Cosi Pria car seat and all included components from the packaging. Do not discard the packaging until you have verified all parts are present and the seat is undamaged. This checklist ensures you have everything needed for safe installation and use.
Your Pria package should include:
- Maxi-Cosi Pria Car Seat: The main car seat structure.
- Base: The detachable base for installation.
- Harness Straps: Five-point harness system.
- Buckle: Secures the harness straps.
- Cup Holders (x2): Removable beverage holders.
- Instruction Manual: This document!
- Registration Card: For product registration.

Verify that all components are present. If anything is missing or appears damaged, do not attempt to install or use the car seat. Contact Maxi-Cosi customer support immediately for assistance and replacement parts. Proper assembly requires all listed components in good condition.
Identifying All Parts
Familiarizing yourself with each part of the Maxi-Cosi Pria is crucial for correct installation and operation. This section details each component and its function, ensuring a secure and comfortable ride for your child. Let’s break down the seat’s anatomy.
Key Components:
- Shell: The main structural body of the car seat, providing impact protection.
- Base: Connects to your vehicle and secures the shell. Features LATCH connectors and a belt path.
- Harness: The five-point safety system, including shoulder straps and a buckle.
- Headrest: Adjustable to accommodate your growing child, offering optimal head and neck support.
- Recline Adjuster: Allows you to adjust the seat angle for comfort and proper positioning.
- Cup Holders: Convenient for holding drinks and snacks.
- LATCH Connectors: Used for a secure connection to the vehicle’s lower anchors.
- Buckle: Fastens the harness straps, keeping your child safely secured.
Refer to the diagrams within this manual for visual identification of each part. Understanding these components will simplify the installation process.
Checking for Damage
Before each use, and especially after any incident, thoroughly inspect your Maxi-Cosi Pria for any signs of damage. A compromised car seat can significantly reduce its protective capabilities. Your child’s safety depends on a fully functional seat.
What to Inspect:
- Shell: Look for cracks, fractures, or any deformation of the plastic.
- Harness: Check for fraying, cuts, or damage to the webbing and buckle. Ensure the buckle operates smoothly.
- LATCH Connectors: Verify they are securely attached and undamaged.
- Base: Inspect for cracks or damage to the base structure and belt path.
- Headrest: Ensure it adjusts properly and isn’t damaged.
- Fabric: Look for tears or significant wear.
If you discover any damage, immediately discontinue use of the car seat. Contact Maxi-Cosi customer support for guidance on replacement or repair. Do not attempt to repair the seat yourself. A damaged car seat should never be used, even for minor trips.
Installation – Rear-Facing Mode (Newborn to 40 lbs)
Rear-facing is the safest position for your child. The Maxi-Cosi Pria is designed for rear-facing use from birth up to 40 pounds. Proper installation is crucial for optimal protection. Always refer to your vehicle’s owner’s manual for specific installation instructions related to your car model.
Key Considerations:
- Recline Angle: Ensure the car seat is reclined at the correct angle, indicated by the recline indicator on the seat. This supports your baby’s head and neck.
- Level Installation: The car seat must be installed level. Use a bubble level if necessary.
- Tightness: The car seat should not move more than 1 inch side-to-side or front-to-back when tested at the belt path.
You can install the Pria rear-facing using either the LATCH system or the vehicle’s seat belt. Detailed instructions for each method follow in the subsequent sections. Always double-check your installation before each journey to ensure it remains secure.
LATCH System Installation
The Lower Anchors and Tethers for Children (LATCH) system provides a convenient and secure method for installing the Maxi-Cosi Pria rear-facing. Before beginning, familiarize yourself with your vehicle’s LATCH anchor points – these are typically located in the seat bight, where the seat back and cushion meet.
Steps for LATCH Installation:
- Locate Anchors: Identify the lower anchor points in your vehicle.
- Connect Connectors: Attach the car seat’s LATCH connectors to the vehicle’s lower anchors. You should hear a distinct click, confirming a secure connection.
- Initial Tightening: Pull the LATCH straps to remove initial slack.
- Final Tightening: Continue tightening the straps until the car seat is firmly installed and does not move more than 1 inch side-to-side or front-to-back.

Important Note: If you are installing multiple car seats using the LATCH system, consult your vehicle’s owner’s manual for weight limitations. Always verify a secure installation before each use.
Connecting Lower Anchors
Successfully connecting the lower anchors is crucial for a secure installation of your Maxi-Cosi Pria. The Pria utilizes rigid LATCH connectors, designed to easily attach to the corresponding anchor points within your vehicle’s seating. Before connecting, ensure the LATCH connectors are fully extended and free from any obstructions.
Connection Procedure:
- Positioning: Align the car seat’s LATCH connectors with the vehicle’s lower anchor points.
- Attachment: Push the connector firmly into the anchor until you hear a distinct ‘click’. This indicates a secure lock.
- Verification: Gently tug on the car seat to confirm the connectors are firmly attached and haven’t dislodged. Repeat for the second connector.
- Equal Engagement: Ensure both connectors are equally engaged to distribute the force evenly.

Troubleshooting: If a connector doesn’t click into place, try repositioning the car seat slightly or checking for debris within the anchor point. Never force the connection.
Tightening the LATCH Straps
Once the lower anchors are securely connected, tightening the LATCH straps is essential to eliminate slack and achieve a snug, stable installation of your Maxi-Cosi Pria. The LATCH straps work in conjunction with the anchors to firmly secure the car seat to your vehicle.
Tightening Procedure:
- Locate Straps: Identify the LATCH straps extending from the car seat.
- Pull to Tighten: Pull the loose ends of the straps firmly and evenly. This will draw the car seat closer to the vehicle seat.
- Force Limit: Continue tightening until the car seat moves less than 1 inch side-to-side or front-to-back when tested at the belt path.
- Even Tension: Ensure both LATCH straps are tightened equally to prevent uneven pressure.
Important Note: Avoid using excessive force, as this could damage the straps or the vehicle’s anchor points. Regularly check the tightness of the straps, especially after adjustments or during long trips.
Seat Belt Installation – Rear-Facing
If your vehicle does not have LATCH anchors, or if you prefer to install using the seat belt, follow these instructions for a secure rear-facing installation of your Maxi-Cosi Pria. Proper seat belt installation is crucial for your child’s safety.
Installation Steps:
- Route the Belt: Thread the vehicle’s seat belt through the correct belt path on the car seat – refer to the diagrams in this manual.
- Buckle the Belt: Buckle the seat belt securely.
- Lock the Belt: Engage the vehicle’s seat belt locking mechanism. This is typically an ALR (Automatic Locking Retractor) or a switchable retractor.
- Tighten the Belt: Push down firmly on the car seat while pulling the shoulder belt to remove slack.
- Check for Movement: Ensure the car seat moves less than 1 inch side-to-side or front-to-back at the belt path.
Important Reminder: Always consult your vehicle owner’s manual for specific instructions on seat belt usage and locking mechanisms;
Routing the Seat Belt
Correctly routing the vehicle’s seat belt through the Maxi-Cosi Pria is the first step to a secure installation. Improper routing can compromise the car seat’s protective capabilities. Always refer to the diagrams provided specifically for rear-facing installation, as the path differs from forward-facing.
Rear-Facing Routing: Locate the designated belt paths on the Pria car seat. These are clearly marked. Thread the seat belt through both sets of belt paths – one on each side of the car seat. Ensure the seat belt webbing lies flat and isn’t twisted. A twisted belt can reduce its effectiveness in a crash.

Visual Confirmation: Double-check that the seat belt is correctly positioned within the belt paths before proceeding to buckle it. The belt should sit snugly within the guides, without any bunching or overlapping of the webbing. Incorrect routing will prevent proper locking and tightening.
Vehicle Manual: Refer to your vehicle’s owner’s manual for clarification on the location of the seat belt buckle and retractor mechanism.
Locking the Seat Belt
After routing the seat belt correctly, locking it is crucial for a secure installation of the Maxi-Cosi Pria. Most modern vehicles have one of two seat belt locking mechanisms: a switchable retractor or a locking latch plate. Identifying which your vehicle has is essential.
Switchable Retractor: Pull the seat belt all the way out until it stops, then slowly allow it to retract. You should hear a clicking sound as the retractor engages, locking the belt. Test by attempting to pull more belt out – it should not extend further.
Locking Latch Plate: If your vehicle doesn’t have a switchable retractor, the latch plate itself locks. After buckling the seat belt, firmly pull the shoulder belt portion of the belt. The latch plate should click into a locked position. Again, test by attempting to pull more belt through.
Confirmation is Key: Always confirm the seat belt is locked before proceeding. A properly locked belt will not allow any slack. If unsure, consult your vehicle’s owner’s manual for specific locking instructions.
Installation – Forward-Facing Mode (22-65 lbs)
Transitioning to forward-facing mode with the Maxi-Cosi Pria requires careful attention to ensure continued safety for your growing child. This mode is appropriate for children weighing between 22 and 65 pounds and who have outgrown the rear-facing height or weight limits.
Preparation: First, ensure the Pria is in the upright position. Locate the forward-facing belt path through the car seat. The recline angle should be adjusted to the appropriate position as indicated on the car seat’s side – typically, a more upright position is recommended for forward-facing.
Installation Options: You can install the Pria forward-facing using either the LATCH system or the vehicle’s seat belt. Always use one or the other – never both simultaneously. The following sections detail each method. Remember to always consult your vehicle’s owner’s manual for compatibility and specific instructions regarding car seat installation.
Top Tether Importance: When forward-facing, always use the top tether strap. This significantly reduces head excursion in a crash.
LATCH System Installation – Forward-Facing
Utilizing the LATCH (Lower Anchors and Tethers for Children) system for forward-facing installation of your Maxi-Cosi Pria offers a secure and convenient method. Begin by locating the lower anchor connectors on the car seat – these are typically revealed by lifting a flap or pressing a release button.
Connecting to Vehicle Anchors: Align the car seat’s lower anchor connectors with the corresponding lower anchors in your vehicle seat. Push the connectors firmly until they click into place, confirming a secure connection. It’s crucial to verify this connection before proceeding.
Tightening the Straps: Once connected, tighten the LATCH straps to eliminate slack. Pull the adjustment straps until the car seat is installed firmly and does not move more than one inch side-to-side or front-to-back. A snug fit is paramount for optimal safety.
Top Tether Connection: Do not forget to connect the top tether strap to the designated anchor point in your vehicle. This is essential for minimizing head movement during a collision. Refer to your vehicle’s manual for the tether anchor location.
Seat Belt Installation – Forward-Facing
If your vehicle does not have LATCH anchors, or if you prefer, you can securely install the Maxi-Cosi Pria forward-facing using the vehicle’s seat belt. Begin by placing the car seat in the desired position and routing the seat belt through the designated belt path, as indicated on the car seat’s label and in the diagrams.
Locking the Seat Belt: To ensure a tight installation, you must lock the seat belt. The method for locking varies by vehicle – some use a switch on the buckle, while others require pulling the belt all the way out until it ratchets. Consult your vehicle’s owner’s manual for specific instructions.
Tightening the Belt: Once locked, firmly press down on the car seat while simultaneously pulling the shoulder belt to remove any slack. The car seat should not move more than one inch side-to-side or front-to-back.
Top Tether is Crucial: Always remember to connect the top tether strap to the appropriate anchor point in your vehicle when using seat belt installation forward-facing. This significantly enhances safety.
Using the Top Tether
The top tether is essential for forward-facing installations, dramatically reducing head excursion in a crash. Locate the tether anchor point in your vehicle – it’s usually on the vehicle seat, the rear shelf, or a designated location on the vehicle wall. Consult your vehicle’s owner’s manual for the precise location.
Attaching the Tether: Thread the Maxi-Cosi Pria’s top tether strap through the vehicle’s anchor point. Adjust the tether strap to eliminate any slack, ensuring a snug fit. The tether should be taut, but not overly tightened, which could strain the anchor point.
Checking for Correct Installation: After attaching the tether, re-check the overall car seat installation. The seat should move less than one inch side-to-side or front-to-back. A properly installed top tether minimizes rotation and significantly improves safety.
Important Reminder: Always use the top tether when installing the Pria forward-facing. Failure to do so compromises the car seat’s protective capabilities.
Harness Adjustment and Re-Threading
Proper harness fit is crucial for your child’s safety. The harness must be adjusted as your child grows to ensure optimal protection. The Maxi-Cosi Pria’s harness features multiple height positions, requiring occasional re-threading.
Re-Threading the Harness: To adjust the harness height, first loosen all straps. Locate the harness re-thread slots behind the car seat shell. Remove the harness straps from their current slots and insert them through the new, appropriately positioned slots. Ensure both sides are at the same height.
Checking the Fit: After re-threading, re-secure the harness straps. The straps should be at or just above your child’s shoulders in rear-facing mode, and at or below their shoulders in forward-facing mode. Always double-check the harness path to ensure it isn’t twisted.
Reminder: Regularly inspect the harness for wear and tear. Never use a damaged harness. Re-thread the harness whenever your child outgrows the current height setting.
Adjusting Harness Height
Maintaining the correct harness height is vital as your child grows with the Maxi-Cosi Pria. Incorrect height placement compromises safety during a collision. Regularly check and adjust the harness to ensure optimal protection.
Rear-Facing Adjustment: When rear-facing, the harness straps should originate at or below your child’s shoulders. This ensures the force of impact is distributed correctly across the strongest parts of their body. As your baby grows, raise the harness height accordingly.
Forward-Facing Adjustment: In forward-facing mode, the harness straps must be positioned at or above your child’s shoulders. This prevents the harness from slipping off during a crash. Always verify the strap placement after each adjustment.
Visual Indicators: The Maxi-Cosi Pria features clearly marked harness slots to guide you. Refer to the diagrams in this manual for precise positioning. Remember to re-thread the harness – do not simply lengthen the straps – to achieve the correct height.
Tightening and Loosening the Harness
Proper harness tightness is crucial for your child’s safety in the Maxi-Cosi Pria. A snug fit minimizes forward movement during sudden stops or collisions. However, avoid over-tightening, which can cause discomfort.
Tightening the Harness: To tighten, pull the harness adjustment strap located at the child’s hips. Continue pulling until the harness is snug – you should not be able to pinch any excess webbing at the shoulder. A good test is the “pinch test”; if you can pinch webbing at the shoulder, tighten further.

Loosening the Harness: To loosen, lift the red release button on the harness adjuster. While holding the button, pull on the shoulder straps to create slack. Release the button once the desired looseness is achieved. Ensure the harness isn’t too loose before securing your child.
Regular Checks: Always re-check harness tightness before each journey. Clothing can compress, and the harness can shift, affecting its effectiveness. Prioritize a secure, comfortable fit for optimal protection.
Recline Positions and Adjustment
The Maxi-Cosi Pria offers multiple recline positions to accommodate your growing child and ensure comfortable travel, whether rear-facing or forward-facing. Proper recline is vital for maintaining the correct head and neck support.
Adjusting the Recline: Locate the recline adjuster lever, typically situated at the front base of the car seat. To adjust, lift the lever and simultaneously lean the car seat forward or backward to the desired position. Release the lever to lock the recline into place. Always verify the position is secure before use.
Rear-Facing Recline: When rear-facing, ensure the recline is sufficiently angled to prevent your baby’s head from flopping forward. Refer to the recline indicator guide on the side of the seat.
Forward-Facing Recline: While forward-facing, a more upright position is generally preferred. However, adjust to your child’s comfort, ensuring their head is well-supported. Regularly check and adjust as needed.
Cleaning and Maintenance
Maintaining your Maxi-Cosi Pria car seat’s cleanliness and condition is crucial for hygiene and longevity. Regular cleaning helps prevent the buildup of dirt, spills, and bacteria, ensuring a safe and comfortable environment for your child.
Routine Cleaning: Wipe down the plastic shell and harness straps with a damp cloth and mild soap. For stubborn stains, use a diluted solution of gentle detergent and water. Avoid harsh chemicals or abrasive cleaners, as these can damage the materials.
Fabric Care: The fabric cover is removable and machine washable. Use a cold, gentle cycle with a mild detergent. Air dry only; do not tumble dry. Ensure the fabric is completely dry before reinstalling it on the car seat.
Periodic Checks: Regularly inspect the car seat for any signs of wear and tear, damage, or loose components. Address any issues promptly to maintain optimal safety performance. Avoid storing the car seat in direct sunlight for extended periods.

Fabric Care
Proper fabric care is essential for maintaining the comfort and hygiene of your Maxi-Cosi Pria car seat. The fabric cover is designed to be removable for convenient cleaning, ensuring a fresh and safe environment for your child.
Removal & Washing: Carefully detach the fabric cover following the instructions in the “Harness Adjustment and Re-Threading” section. Machine wash the cover in cold water on a gentle cycle, using a mild detergent. Avoid using bleach or fabric softeners, as these can compromise the fabric’s integrity.
Drying Instructions: Crucially, air dry the fabric cover completely. Do not tumble dry, as heat can cause shrinkage or damage. Ensure the fabric is thoroughly dry before reinstalling it onto the car seat frame. Moisture can promote mildew growth.
Spot Cleaning: For minor spills or stains, spot clean with a damp cloth and mild soap. Test the cleaning solution on an inconspicuous area first to ensure colorfastness. Regular cleaning extends the life of the fabric and maintains its appearance.
Shell Cleaning
Maintaining the shell of your Maxi-Cosi Pria car seat is vital for hygiene and longevity. While the fabric cover protects much of the surface, the plastic shell requires periodic cleaning to remove dirt, spills, and grime. Always disconnect the car seat from the vehicle before cleaning.
Cleaning Procedure: Use a damp cloth with a mild soap solution to wipe down the plastic shell. Avoid abrasive cleaners, solvents, or strong detergents, as these can damage the material. Pay particular attention to crevices and areas prone to collecting debris.
Stubborn Stains: For tougher stains, a paste of baking soda and water can be gently applied and left for a few minutes before wiping clean. Rinse thoroughly with a clean, damp cloth to remove any soap residue. Ensure all cleaning agents are completely removed.
Drying: Dry the shell with a clean, dry cloth. Never submerge the car seat shell in water. Allow it to air dry completely before reinstalling or using the car seat. Regular shell cleaning contributes to a safer and more pleasant experience.
Safety Precautions and Warnings
Critical Safety Information: Your child’s safety is paramount. Always read and understand this entire manual before installing or using the Maxi-Cosi Pria. Never modify the car seat in any way. Use only genuine Maxi-Cosi replacement parts.
Important Warnings: Never leave your child unattended in the car seat. Regularly check the harness straps for wear and tear. Do not use the car seat if it has been involved in a moderate to severe accident. Discontinue use after 6 years from the date of manufacture.
Rear-Facing & Forward-Facing: Keep your child rear-facing for as long as possible, up to the maximum height and weight limits. Incorrect installation can significantly reduce the car seat’s protective capabilities. Ensure the car seat is securely installed and the harness is properly adjusted.
Vehicle Compatibility: Verify the Maxi-Cosi Pria is compatible with your vehicle before installation. Consult your vehicle owner’s manual for specific instructions. Ignoring these precautions could result in serious injury or death.
Frequently Asked Questions (FAQ)
Q: My LATCH straps seem loose. What should I do? A: Double-check the connection to the vehicle’s anchors and ensure the straps are fully tightened. If issues persist, try using the seat belt installation method.
Q: How do I know if the car seat is installed correctly? A: The car seat should not move more than one inch side-to-side or front-to-back when tested at the belt path. A professional car seat check is recommended.
Q: Can I use an aftermarket car seat protector? A: Maxi-Cosi recommends against using aftermarket protectors as they may interfere with the car seat’s performance in a crash. Use only approved accessories.
Q: What if I can’t get a tight enough installation? A: Try a different seating position in your vehicle. Consult your vehicle owner’s manual and consider seeking assistance from a certified Child Passenger Safety Technician (CPST).
Q: Where can I find a CPST? A: Visit the National Child Passenger Safety Certification website (https://cert.safekids.org/) to locate a technician near you.
Troubleshooting Common Issues
Issue: Car seat won’t tighten securely. Check LATCH connectors are firmly attached and the vehicle’s anchors aren’t exceeding weight limits. If using the seat belt, ensure it’s locked. Re-attempt installation, following instructions carefully.
Issue: Harness straps are difficult to adjust; Ensure the harness is fully extended before attempting to tighten. Check for obstructions preventing smooth movement. If still difficult, contact customer support.
Issue: Recline mechanism is stuck. Gently but firmly try to adjust the recline lever. Avoid excessive force. Inspect for debris obstructing the mechanism. If it remains stuck, do not use the seat and contact Maxi-Cosi.
Issue: Fabric is stained. Refer to the ‘Cleaning and Maintenance’ section for appropriate cleaning methods. Avoid harsh chemicals. Spot test any cleaning solution in an inconspicuous area first.
Issue: Installation seems impossible in my vehicle. Consult your vehicle’s owner’s manual for compatibility. Try a different seating position. Seek assistance from a certified Child Passenger Safety Technician (CPST).
Leave a Reply
You must be logged in to post a comment.