hermitlux countertop dishwasher manual
Hermitlux Countertop Dishwasher Manual: A Comprehensive Guide
This manual provides detailed instructions for optimal use of your Hermitlux dishwasher, covering setup, operation, maintenance, and troubleshooting,
leveraging Microsoft’s software support ecosystem for a seamless experience.
Welcome to the world of convenient dishwashing! Your Hermitlux countertop dishwasher is designed to provide sparkling clean dishes with minimal effort, mirroring Microsoft’s commitment to simplifying technology for everyday use. This compact appliance is perfect for smaller households, apartments, or anyone seeking a space-saving solution without compromising on cleanliness.
This manual serves as your comprehensive guide, detailing everything from initial setup and operation to routine maintenance and troubleshooting. We’ve incorporated insights from resources like the official Microsoft Download Center, ensuring a user-friendly experience akin to navigating Microsoft’s intuitive interfaces. Like Microsoft’s diverse operating system support (Windows, Mac, Linux, iOS, and Android), the Hermitlux dishwasher aims for broad usability.
Prepare to explore features designed to enhance your kitchen experience, supported by the same dedication to quality and innovation found in Microsoft products like Office, Xbox, and Azure.
Understanding Your Dishwasher Model
Familiarizing yourself with your Hermitlux dishwasher’s components is crucial for optimal performance. Like understanding the various Microsoft 365 apps – Word, Excel, PowerPoint – knowing your dishwasher’s parts unlocks its full potential. This model features a robust filtration system, adjustable spray arms, and a user-friendly control panel, designed for efficient cleaning.
Refer to the included diagram for a detailed overview of each part. The interior rack is designed to accommodate various dish sizes and types, similar to how Microsoft’s products cater to diverse user needs. The detergent dispenser ensures precise dosage, while the drain hose facilitates easy water removal.
This dishwasher operates on standard household voltage, mirroring the broad compatibility of Microsoft software. Before first use, carefully review the safety precautions outlined in this manual and on the Microsoft Support website for related appliance safety guidelines.

Setting Up Your Hermitlux Dishwasher
Proper setup ensures efficient operation. This involves unboxing, connecting water and drain lines, and verifying electrical compatibility, mirroring Microsoft’s installation processes.
Unboxing and Initial Inspection
Carefully unpack your Hermitlux countertop dishwasher, ensuring all packaging materials are removed. Inspect the unit for any visible damage incurred during shipping – dents, scratches, or broken components. Compare the contents against the included parts list; this typically includes the dishwasher itself, a water inlet hose, a drain hose, a power cord, and this user manual.
Retain all packaging materials for potential returns or warranty claims. Verify the model number on the dishwasher matches the one on your purchase receipt and the box; Check the spray arms and filter for proper installation and freedom of movement.
If any damage or missing parts are discovered, do not attempt to operate the dishwasher. Immediately contact Hermitlux customer support (details in the warranty section) or the retailer where you purchased the unit. Document any damage with photographs for claim purposes, similar to documenting issues with Microsoft product installations.
Connecting to Water Supply
Before connecting, ensure your water supply is within the dishwasher’s pressure range (typically 30-110 PSI). Locate the water inlet valve on the rear of the Hermitlux dishwasher. Attach the supplied water inlet hose to both the valve and a suitable hot water faucet – hot water improves cleaning performance. Use Teflon tape on the threads to prevent leaks, tightening securely by hand, then gently with a wrench.
Do not overtighten, as this can damage the valve or hose. Ensure the hose is not kinked or bent, restricting water flow. Some models may require an adapter for your faucet; check the included accessories.
Similar to installing Microsoft software updates, a stable connection is crucial. After connecting, slowly turn on the water supply and check for leaks at both connections. If leaks are present, tighten further or re-apply Teflon tape. Never use a damaged hose; replace it immediately.
Connecting to Drain
Proper drainage is essential for optimal dishwasher performance. Locate the drain hose outlet on the rear of your Hermitlux dishwasher. Connect the supplied drain hose securely to the outlet. The other end of the hose must be connected to a suitable household drain – typically a sink drain or garbage disposal. Ensure the hose is elevated to prevent backflow, ideally looping it as high as possible under the sink.
Avoid sharp bends or kinks in the drain hose, as these can restrict water flow. Like Microsoft’s troubleshooting guides, a clear pathway is vital. Secure the hose with a clamp to prevent accidental disconnections.
Never connect the drain hose directly to a washing machine drain. After connecting, run a short wash cycle and check for leaks at all connections. If leaks occur, tighten the clamps or reposition the hose. A secure drain connection prevents water damage.
Electrical Requirements and Safety
Your Hermitlux countertop dishwasher requires a dedicated 120V, 60Hz electrical outlet. Do not use extension cords or adapters. Similar to Microsoft’s product safety standards, ensure the outlet is properly grounded to prevent electrical shock. Before plugging in the dishwasher, verify the voltage matches your household supply.
Never operate the dishwasher with a damaged power cord. If the cord is damaged, it must be replaced by a qualified technician. Avoid operating the dishwasher in damp environments or with wet hands. Always unplug the dishwasher before cleaning or performing maintenance.
Do not attempt to repair the dishwasher yourself; contact customer support for assistance. Like Microsoft Support’s guidance, professional repair is crucial. Keep the power cord away from heat sources and sharp objects. Adhering to these safety precautions will ensure safe and reliable operation.

Operating Your Hermitlux Dishwasher
Effectively utilize your Hermitlux dishwasher by understanding the control panel, proper loading techniques, detergent options, and cycle selections for optimal cleaning results.
Control Panel Overview
The Hermitlux countertop dishwasher’s control panel is designed for intuitive operation, mirroring the user-friendly interfaces found in Microsoft products. It features a clear LED display indicating cycle status and remaining time. Power and Start/Pause buttons are prominently located for easy access.
Cycle selection buttons allow you to choose from various wash programs – Normal, Eco, Quick Wash, and Heavy Duty – catering to different cleaning needs. Additional options include a Delay Start function, enabling convenient scheduling, and a Half Load option for smaller loads, conserving water and energy.
Indicator lights signal water supply, detergent levels, and any error codes, providing immediate feedback. The panel’s layout is optimized for visibility and ease of use, ensuring a streamlined dishwashing experience, similar to navigating Microsoft’s software applications. Refer to the troubleshooting section for error code definitions.
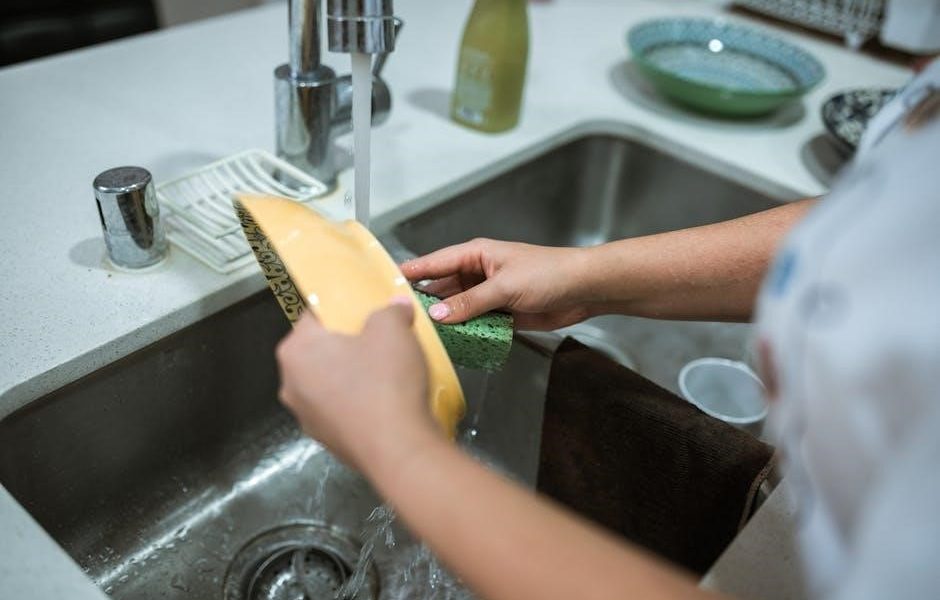
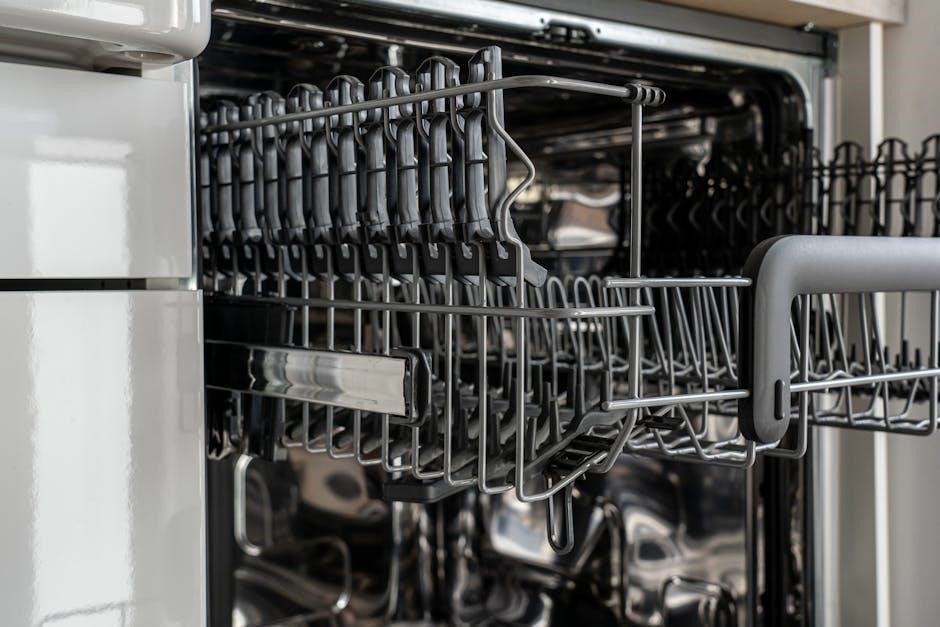
Loading the Dishwasher Correctly
Proper loading maximizes cleaning performance and prevents damage to your dishes, much like organizing files within Microsoft’s OneDrive for efficient access. Arrange items so water reaches all surfaces. Place heavily soiled dishes in the lower rack, facing the spray arm.
The upper rack is ideal for glasses, cups, and smaller items. Ensure tall items don’t obstruct the spray arm’s rotation. Avoid overcrowding; dishes should not nest together. Utensils should be placed in the cutlery basket with handles down for optimal cleaning and safety.
Check that nothing blocks the detergent dispenser or the spray arms. Incorrect loading can lead to poor cleaning results or even damage. Refer to the diagrams within this manual for visual guidance, ensuring a consistently sparkling clean, comparable to the clarity of Microsoft’s Windows interface.
Detergent Usage and Recommendations
Using the correct detergent is crucial for effective cleaning and protecting your Hermitlux dishwasher, similar to utilizing updated software from the Microsoft Download Center for optimal performance. Always use dishwasher detergent specifically designed for automatic dishwashers; hand soap will create excessive suds.
We recommend powdered, gel, or tablet detergents. Follow the detergent manufacturer’s instructions for dosage, adjusting based on water hardness and soil level. Avoid overfilling the dispenser, as this can leave residue on dishes.
For best results, use a rinse aid to prevent water spots and enhance drying, much like Microsoft 365’s features enhance productivity. Regularly check the detergent dispenser to ensure it’s functioning correctly. Using the appropriate detergent ensures sparkling clean dishes and prolongs the life of your Hermitlux dishwasher.
Selecting Wash Cycles
Your Hermitlux dishwasher offers a variety of wash cycles to accommodate different cleaning needs, mirroring the diverse range of Microsoft products available for various tasks. The Normal cycle is ideal for everyday dish loads with moderate soil levels. For heavily soiled pots and pans, select the Heavy cycle for increased cleaning power.
The Eco cycle conserves water and energy, similar to Microsoft’s commitment to sustainability. A Quick cycle provides a faster wash for lightly soiled dishes. Utilize the Glass cycle for delicate glassware, ensuring gentle cleaning.
Refer to the control panel overview for specific cycle durations and features. Choosing the correct cycle optimizes cleaning performance and protects your dishes, just as selecting the right Microsoft app enhances your workflow.
Starting and Pausing a Wash Cycle
To initiate a wash cycle, ensure the dishwasher door is securely latched and the desired wash cycle has been selected, akin to launching a program on Windows. Press the Start/Pause button to begin the cycle; a corresponding indicator light will illuminate.
To pause a running cycle, press the Start/Pause button again. The cycle will halt, and the indicator light will likely flash. This allows you to add or remove items if needed, much like pausing a download from the Microsoft Download Center.
To resume the cycle, press the Start/Pause button once more. Avoid interrupting cycles unnecessarily to maintain optimal cleaning performance. Remember to always prioritize safety and follow all electrical requirements, mirroring Microsoft’s security protocols.

Maintenance and Troubleshooting
Regular upkeep ensures peak performance, similar to software updates from Microsoft. This section details filter cleaning, spray arm checks, descaling, and resolving common errors.
Cleaning the Filter System
Maintaining a clean filter is crucial for optimal dishwasher performance. Food particles and debris can accumulate, hindering water circulation and potentially causing blockages. The Hermitlux dishwasher features a multi-stage filter system designed to capture these particles. To access the filter, locate it at the bottom of the dishwasher’s interior – consult the diagrams in this manual for precise location.
Carefully remove the filter assembly, typically by twisting and lifting. Rinse each component thoroughly under running water, using a soft brush to dislodge stubborn residue. Avoid using harsh detergents or abrasive cleaners, as these can damage the filter. Inspect the filter for any tears or damage; replace if necessary. Reassemble the filter correctly, ensuring it’s securely locked into place before operating the dishwasher. Regular filter cleaning – ideally after every few cycles – will contribute to efficient cleaning and prolong the lifespan of your Hermitlux appliance, much like regular software updates from Microsoft maintain system stability.
Cleaning the Spray Arms
The spray arms distribute water throughout the dishwasher, ensuring thorough cleaning. Over time, food particles can clog the spray arm nozzles, reducing water pressure and cleaning effectiveness. To clean the spray arms, first disconnect the dishwasher from the power supply for safety – mirroring responsible practices with Microsoft device maintenance. Locate the spray arms; typically one at the bottom and another at the top of the dishwasher interior.
Carefully remove each spray arm, usually by unscrewing or unclipping them. Inspect the nozzles for blockages. Use a toothpick or fine wire to gently clear any obstructions. Rinse the spray arms thoroughly under running water. Ensure the water can flow freely through all nozzles. Reattach the spray arms securely, verifying they rotate smoothly. Regular cleaning – every month or as needed – will maintain optimal spray performance, similar to how consistent software updates from Microsoft enhance application functionality and responsiveness.
Descaling the Dishwasher
Over time, mineral deposits from hard water can accumulate inside your Hermitlux dishwasher, reducing its efficiency and potentially damaging components. Descaling removes these deposits, restoring optimal performance – akin to maintaining a streamlined operating system like Windows. To descale, use a commercially available dishwasher descaler, following the product’s instructions carefully. Alternatively, you can use white vinegar.
Pour two cups of white vinegar into the dishwasher’s bottom rack. Run an empty hot water cycle. For heavily scaled dishwashers, repeat the process. After descaling, run a regular wash cycle with detergent to remove any residual vinegar smell. Descaling frequency depends on water hardness; monthly for hard water, quarterly for soft water. Regular descaling, like consistent Microsoft software updates, prevents long-term issues and ensures longevity, mirroring the reliability of Microsoft products.
Troubleshooting Common Issues (Error Codes)
Your Hermitlux dishwasher may display error codes indicating specific problems. Refer to this section for common issues and solutions, similar to diagnosing errors within Microsoft’s software ecosystem. Error E1: Water inlet issue – check water supply and inlet valve. Error E2: Drainage problem – inspect drain hose for blockages. Error E3: Temperature sensor fault – contact customer support. Error E4: Detergent dispenser malfunction – ensure proper detergent usage.
If an error persists, try resetting the dishwasher by unplugging it for 5 minutes. Consult the full error code list in the appendix for a comprehensive guide. For complex issues, accessing Microsoft Support resources can be paralleled by contacting Hermitlux customer support; Regular maintenance, like keeping software updated via the Microsoft Download Center, can prevent many errors. Always prioritize safety and disconnect power before any internal inspection.

Addressing Leaks and Drainage Problems
Leaks can occur from various points; immediate attention is crucial. First, check all connections – water inlet hose, drain hose, and spray arm seals – ensuring they are tight. Inspect the door gasket for damage or debris, similar to ensuring secure connections within a Microsoft network. Drainage issues often stem from a clogged filter or drain hose. Remove and clean the filter regularly, and straighten the drain hose, removing any kinks.
If leaks persist, verify the dishwasher is level. For stubborn clogs, carefully flush the drain hose with warm water. Remember, consistent maintenance, like regular software updates from the Microsoft Download Center, prevents issues. If you cannot resolve the problem, contact Hermitlux customer support for assistance. Always disconnect power before attempting any repairs.
Advanced Features and Settings
Explore enhanced functionalities like Delay Start, Half Load, and the Sanitization Cycle, optimizing performance and mirroring Microsoft’s adaptable product range.
Delay Start Function
The Delay Start function allows you to schedule dishwasher operation for a later time, offering convenience and potentially taking advantage of off-peak energy rates. To activate, press the “Delay Start” button repeatedly until the desired delay time (ranging from 30 minutes up to 24 hours, depending on the model) is displayed on the control panel.
Once set, press the “Start/Pause” button. The dishwasher will initiate the selected wash cycle after the programmed delay. This feature is particularly useful for running the dishwasher overnight, ensuring a quiet kitchen during active hours. Remember to ensure the dishwasher is properly loaded with detergent before setting the delay. Like Microsoft’s scheduling tools, this feature provides flexibility and control. Cancelling a delayed start requires pressing and holding the “Start/Pause” button for three seconds.
Half Load Option
The Half Load option is designed for smaller dishwashing tasks, conserving water and energy when a full load isn’t necessary. Activate this feature by pressing the dedicated “Half Load” button on the control panel before starting a wash cycle. The dishwasher will automatically adjust the water usage and cycle duration to suit the reduced load.
This function is ideal for everyday dishwashing needs, preventing unnecessary resource consumption. While effective, it’s important to note that heavily soiled items may require a full cycle for optimal cleaning. Similar to Microsoft’s efficiency features, this option balances performance with resource management. Ensure dishes are arranged to allow water circulation even with a smaller load. The Half Load option is not available on all wash cycles; refer to the cycle chart for compatibility.
Sanitization Cycle
The Sanitization Cycle utilizes higher water temperatures to eliminate up to 99.9% of common household bacteria, providing a superior level of cleanliness. This cycle is recommended for items like baby bottles, cutting boards, and dishes used for preparing raw meat or poultry. Activate the Sanitization Cycle by selecting it from the control panel options before initiating the wash.

This feature extends beyond standard cleaning, offering enhanced hygiene. Similar to Microsoft’s security protocols, it provides an extra layer of protection. Note that this cycle typically has a longer duration and uses more energy. Ensure items are dishwasher-safe before using this cycle. Proper loading is crucial for effective sanitization; avoid overcrowding. The Sanitization Cycle may not be compatible with all detergents; check detergent packaging for suitability.

Safety Information and Warranty
Prioritize safety with crucial precautions, and understand your Hermitlux dishwasher’s warranty details for comprehensive coverage, mirroring Microsoft’s product support commitments.
Important Safety Precautions
To ensure safe operation of your Hermitlux countertop dishwasher, always disconnect the power supply before performing any maintenance or cleaning. Never operate the dishwasher with a damaged power cord or plug; replace immediately.
Ensure proper grounding to prevent electrical shock, similar to the security measures employed by Microsoft for its software.
Keep children and pets away from the dishwasher during operation, as internal surfaces can become hot.
Do not attempt to repair the dishwasher yourself; contact qualified service personnel for assistance.
Avoid using flammable solvents or harsh chemicals for cleaning, as they may damage the unit or create a fire hazard.
Always load dishes according to the instructions to prevent injury or damage to the appliance.
Be cautious when opening the door after a wash cycle, as steam may escape.
Follow all water supply and drainage connection guidelines to prevent leaks and potential water damage.
Regularly inspect the spray arms for cracks or damage, and replace if necessary. Prioritize safety, mirroring Microsoft’s commitment to secure user experiences.
Hermitlux Warranty Details
Hermitlux warrants this countertop dishwasher against defects in materials and workmanship for a period of one (1) year from the date of original purchase. This warranty covers parts and labor for repairs necessary to restore the dishwasher to proper operating condition.
Damage resulting from misuse, abuse, improper installation, or unauthorized repairs is not covered.
To initiate a warranty claim, please retain your proof of purchase and contact Hermitlux customer support.
Like Microsoft’s support for its products, we aim for swift resolution.
The warranty is void if the dishwasher is used for commercial purposes.
Hermitlux reserves the right to replace defective parts with new or refurbished components.
This warranty gives you specific legal rights, and you may have other rights which vary by location.
For complete warranty terms and conditions, please visit our website or contact customer support. We stand behind the quality of our products, offering a reliable experience akin to Microsoft’s software updates.
Customer Support Contact Information
For assistance with your Hermitlux countertop dishwasher, our dedicated customer support team is readily available. You can reach us via several convenient channels.
Our toll-free number is 1-800-HERMITLUX (1-800-437-6485), available Monday through Friday, 9 AM to 5 PM EST.
Alternatively, you can email us at support@hermitlux.com, and we strive to respond within 24-48 hours.
Visit our comprehensive online support portal at www.hermitlux.com/support for FAQs, troubleshooting guides, and downloadable manuals – similar to Microsoft’s online resources.
We also offer live chat support through our website during business hours.
For warranty claims, please have your proof of purchase ready.
Our team is committed to providing prompt and helpful assistance, ensuring a positive experience with your Hermitlux appliance. We value your feedback and aim to resolve any issues efficiently.
Leave a Reply
You must be logged in to post a comment.